Finding your computer asleep when you come back from your tea break might be annoying but what’s even more frustrating is when doing long software installs where screen lock and/or sleep mode may be enforced by the system administrator or when you just need to be somewhere else other than at your computer desk. You can of course change the power and sleep options, but another funny option is the application of a Mouse Wiggler, which can simulate mouse movement to prevent operating system’s inactivity timers from starting. That means a mouse wiggler (also called as mouse jiggler or mouse mover) can simply prevent the desktop from locking by tricking the system into thinking a human is moving the mouse!
So, if you are looking for a do it yourself way to keep your computer screen live when your work involves waiting for lengthy operations to complete, then head to the micro mouse wiggler project presented here and build your own micro mouse wiggler with the help of a stamp-sized microcontroller board. Well, let’s get started!
Working from Home?
Yes, when a computer is apparently idle, a mouse jiggler can keep your computer from sleeping which lets you do many other routine things when working in the security of your own home – all while staying productive.
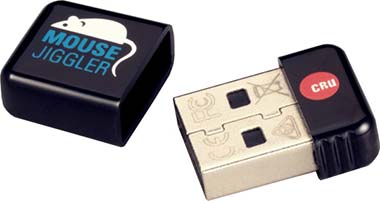
Look, the most obvious (and quite popular) mouse wiggler solution would be to buy a USB Mouse Jiggler (see below) which simulates an additional hardware mouse generating imperceptibly small mouse pointer-events in a sporadic manner to prevent the inactivity timer from kicking in.
Some other obvious thing to do is to implement the mouse jiggler feature in software i.e. just buy an appropriate third-party mouse jiggler application from your trusty software vendor.

Although we have the aforesaid ‘click-pay-buy’ options in front, I’d like to introduce another pretty prissy and underbudget option – an Arduino Mouse Wiggler!

Arduino Mouse Wiggler
This project demonstrated how to build a minimalistic mouse wiggler with an Arduino Pro Micro (5V/16MHz). Since this micro mouse wiggler uses zero parts except for the Pro Micro board, you don’t have to buy any additional hardware for your micro mouse wiggler project!
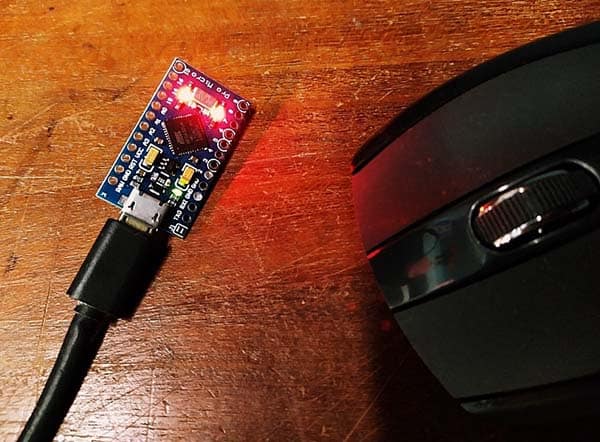
The tried and tested Arduino sketch is attached below. Make sure you have the “Mouse” library installed before uploading the sketch to your Pro Micro. The essential library can be downloaded from the author’s GitHub https://github.com/nshadov/screensaver-mouse-jiggler
#include <Mouse.h> // Special Library

/*
 *  Micro Mouse Wiggler v1
 *  An Arduino (Pro Micro) Hardware Mouse Emulator
 *  OS platform: Windows 10 (x64)
 *  Arduino IDE: 1.8.13
 *  Project by T.K.Hareendran / 01.2021
 *  Thanks to https://github.com/nshadov
 */

int move_interval = 3;
int loop_interval = 15000; // Reiteration time interval

void setup()
{
  Serial.begin(9600);
  randomSeed(analogRead(0)); // See Addendum
  Mouse.begin();
}

void loop()
{
  int distance = random(10, 800);
  int x = random(3) - 1;
  int y = random(3) - 1;
  for (int i = 0; i < distance; i++) {
    Mouse.move(x, y, 0);
    delay(move_interval);
  }
  delay(loop_interval);
}
Since the Arduino Pro Micro board is powered by ATmega32u4 chip, which makes it one of a few Arduino boards with inbuilt USB communication capabilities, the pretty clean sketch shown above makes your Arduino Pro Micro behave like a USB mouse executing regular random movements (the mouse cursor moves in random diagonals every fifteen seconds).
After installation on your Pro Micro and plugging it to computer USB port it registers itself as regular USB HID-compliant mouse. Thereafter, every few seconds it makes tiny cursor movements to foreclose system screen lock/sleep activities.

Enclosure Requirement
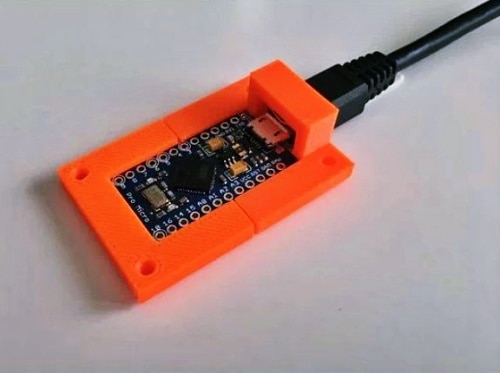
Exposed electronics is always dangerous because an accidental short-circuit not only kill the open circuitry but also damage associated devices (it happens to me occasionally). So, consider putting your Pro Micro board in a cute enclosure or holder (https://www.thingiverse.com/thing:3745009), or simply use a big transparent heat shrink tube to make it free from the risk of harm.
Admitted, like all great ideas, this one has already been thought of before (https://gr33nonline.wordpress.com/2016/10/19/usb-shenanigans/). After some slight modifications, I just employed it in the current version of my hardware mouse wiggler project. That’s all.
Well, hopefully this is enough for you now. If you enjoy this little post, then feel free to make remarks and also make proposals for the following do it yourself projects. Thank You!
Addendum
What does randomSeed(analogRead(0)); do?
Now it’s worthy to note down that the randomSeed() initializes the pseudo-random number generator, causing it to start at an arbitrary point in its random sequence. This sequence, while very long, and random, is always the same (https://www.arduino.cc/reference/en/language/functions/random-numbers/randomseed/).
Coming to the question, simply it seeds the random number generator by a value obtained from doing analogRead on pin A0. Since A0 is left unconnected in this project, the value obtained is random and thus a good seed. Further reading https://www.programmingelectronics.com/using-random-numbers-with-arduino/


will Windows recognize the mouse events are a Mouse emulation via SendInput api call to queue up the mouse event, or will it be a full fledged “hardware” invocation of the action ?
germanGuy: This is a hardware mouse emulator! When plugging it in to the USB port of the computer, it registers itself as regular USB HID mouse (https://www.silabs.com/documents/public/application-notes/AN249.pdf).
As coded, every few seconds it makes tiny cursor movements, emulating user activity and preventing screen-saver from locking up desktop.
As you might noticed, the example code used here relies heavily on the “screensaver-mouse-jiggler” Arduino Library. For more information, you may checkout this link https://github.com/nshadov/screensaver-mouse-jiggler
Thanks!
I just built this with the addition of an on/off switch with LED and randomized the length between mouse moment between 5 and 6 minutes. I posted my build and edited code there.
https://imgur.com/gallery/KPcz2bS
Oh, and one quick warning, Don’t edit the Micro Mouse Wiggler v1 code to run every second to test the code out like I did. If you do you will have to hold down the reset button on the Arduino until the IDE is ready to export your new code.
Kerry: Glad to see your build focused on the Arduino Micro. Thanks!
If you share your custom code here, it may help other readers.
BTW, my design is based on Pro Micro, so resetting, if necessary, can be tricky, because there’s no reset button!